Last September Adobe’s Tom Hogarty demonstrated a Lightroom app on the iPad, and a couple of months ago what looked like a draft announcement made a brief appearance on Adobe’s web site. It was promptly removed, but not before people had taken screenshots saying it would be available at $9.99 a month. That seemed a lot for an iPad app on its own, but it was clear something was coming and wasn’t too far away.
More recently Adobe had failed to released a Lightroom 5.4 Release Candidate at the same time as the corresponding betas of Adobe Camera Raw and the DNG Converter. Early adopters of the Nikon D4s and Fuji’s XT1 were left unable to process their shiny new raw files in Lightroom, and of course they blamed Adobe for their slowness rather than Nikon and Fuji for their failure to offer DNG as an option. I had a few emails asking why Adobe hadn’t rushed out a Lightroom 5.4 beta. Clearly, there was something unusual happening.
The answer came last night – 5.4 has been released with an iPad app, Lightroom mobile.
I quite like it, even if I think Adobe have made some avoidable mistakes, but I’m going to focus on the gotchas. After all, there will be enough gushing stuff elsewhere, or tap by tap instructions and even books on it. So it’s gotchas here….
What it’s for

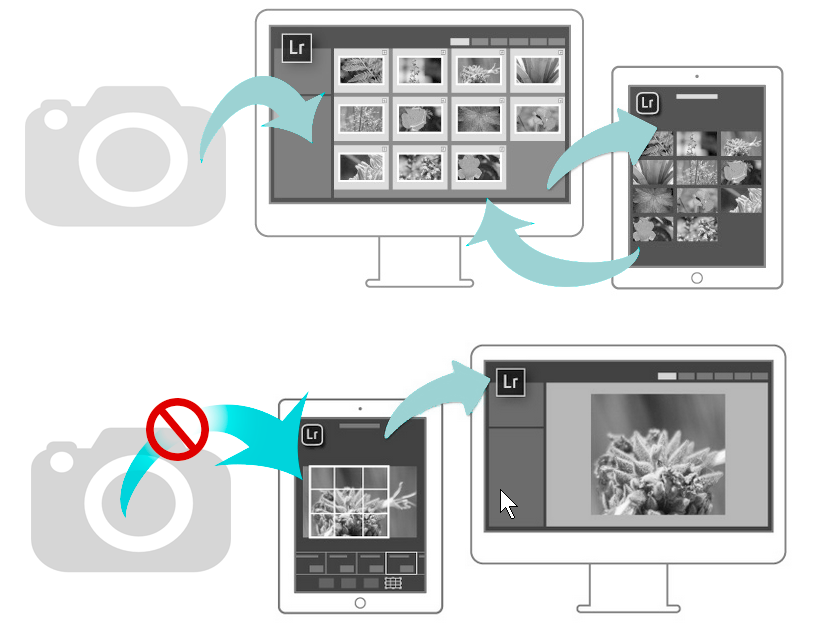
The workflow is between the computer and the iPad – not, as some expect, from camera to iPad to computer
Don’t fall into the trap of thinking Lightroom mobile is any substitute for the full Lightroom experience. It isn’t and it doesn’t claim to be so. See this explanation of why the workflow isn’t camera > LrM > desktop.
Photo editing need not mean exactly the same work that you would do with all that desktop horsepower. The space for tablets is quick and dirty broad adjustments, done at your leisure in moments when you’re not chained to your computer. Doing broad adjustments on the iPad and (just-as-importantly) thinking about the picture’s needs, you can put your serious face on again later when you are back in front of your colour-managed monitor – all that’s left to do is the fine tuning.
Secondly, the app really isn’t just about editing. I find its best use is presentation – just running a quick slideshow on the TV or showing your pictures directly on the iPad. Yes, I know there are apps that do this (I have 3-4 of them), and it’s not rocket science to get pictures into them from LR via Dropbox or whatever (I figure it out afresh each time I tweak my iPad portfolios), but when IT-savvy people like me find that a pain…. None of these methods is remotely as simple as clicking a button next to the collection.
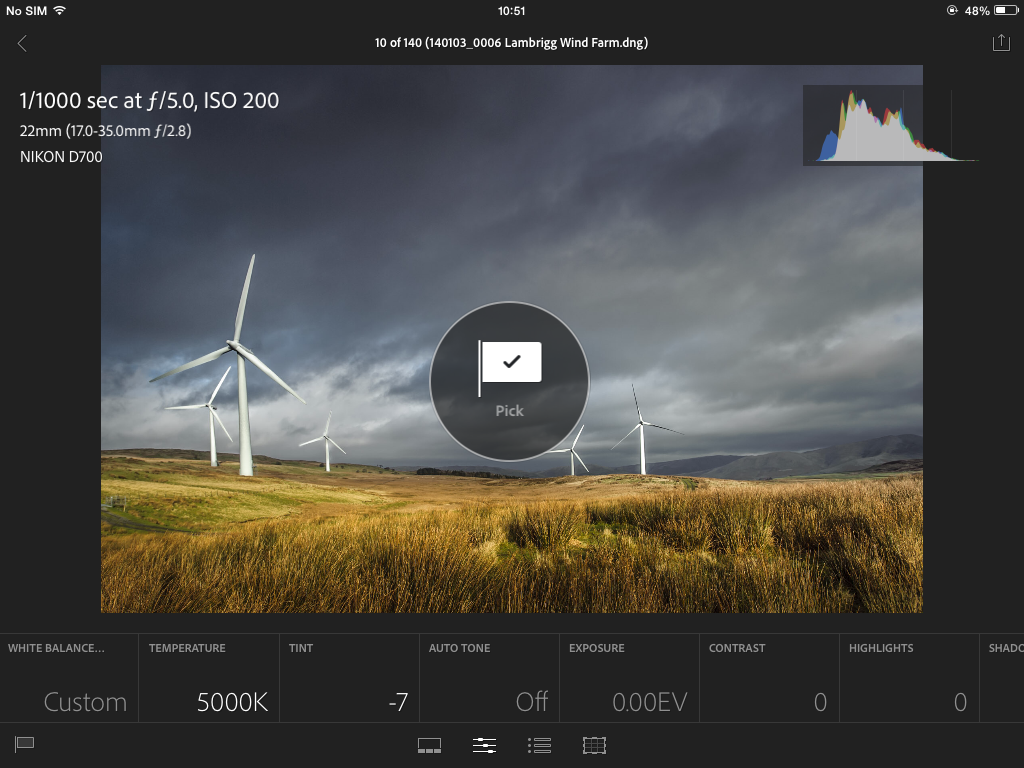
Third, its best use is for casual activity, just flicking through images when you’ve escaped from the desk and deciding which you like or not. Here Adobe dropped the ball – you can only use flags – but it can still be used.
So that’s why I think of it as Lightroom for the pub or for the train or for when you’re sitting in the garden. Use it for:
- Basic panel adjustments
- Pick and reject flags
- Running slideshows on TV
A reason to subscribe?
One of the most obvious points is that Lightroom Mobile is only available with a Creative Cloud subscription. The leaked $9.99 per month standalone app had never looked credible, and including Mobile as part of the CC subscription always made much more sense.
- For one thing, on a technical level some kind of cloud or network would be required to sync photos between desktop and iPad. Allowing users to sync via Dropbox or via a local network might be technically feasible, but would it be economic? In any case, sync is too critical to Mobile for the service to be outside Adobe’s control.
- Just as important, you’ve got to see the iPad app as a benefit for existing subscribers and an inducement to subscribe to the CC. Whatever people think of subscription-limited software, that’s the way Adobe wants to drive its customers – and there’s got to be carrot as well as stick.
Only for iPad?
As someone who owns an iPad 2, I am pleased Adobe decided to Mobile would be supported on any iPads capable of running iOS 7, but plenty of people have questioned the lack of an Android version. Well, I certainly can’t be categorised as pro-Apple – quite the contrary – and yet I think it’s quote easy to defend the decision.
The truth is that whatever the wider ratio of Android and iOS tablets may be, the iPad is overwhelmingly the most common tablet owned by Lightroom users. As evidence for that statement, take this site’s stats which show 60% of mobile visitors here use iPads, 23% iPhones, and the top Android device, the Galaxy, accounts for just 3%. These stats are remarkably similar to Victoria Bampton’s Lightroom Queen site and Lightroom Forums, and I don’t think it’s unlikely that they must be equally representative of the Lightroom user base. After all, you’d have to be pretty weird to spend time on any of these sites if you weren’t a Lightroom user. So it’s a fair bet that upwards of 60% of tablet-owning Lightroom users have iPads, and I’ve no doubt Adobe have done plenty of market research along similar lines. Limiting Mobile to the iPad, at least for now, will be a cold business decision.
Pressing Reset
Before moving on to look at the features, it’s worth giving a tip for older iPad users, or users of older iPads. We all know image processing loves as much memory as it can throw at pictures, but the iPad 2 only has a 512k chip which has been upgraded in the latest generations of iPad. So if you have an iPad 2 and experience crashes with Mobile (or any other app), there may be “low memory errors”. If you want to look at them, they will be listed in the iPad’s log files in Settings > General > About > Diagnostics & Usage > Diagnostics & Usage. But in any case, if you experience crashes I strongly recommend resetting the iPad. It doesn’t do any harm and may well solve low memory crashes caused by Lightroom mobile or any other app.
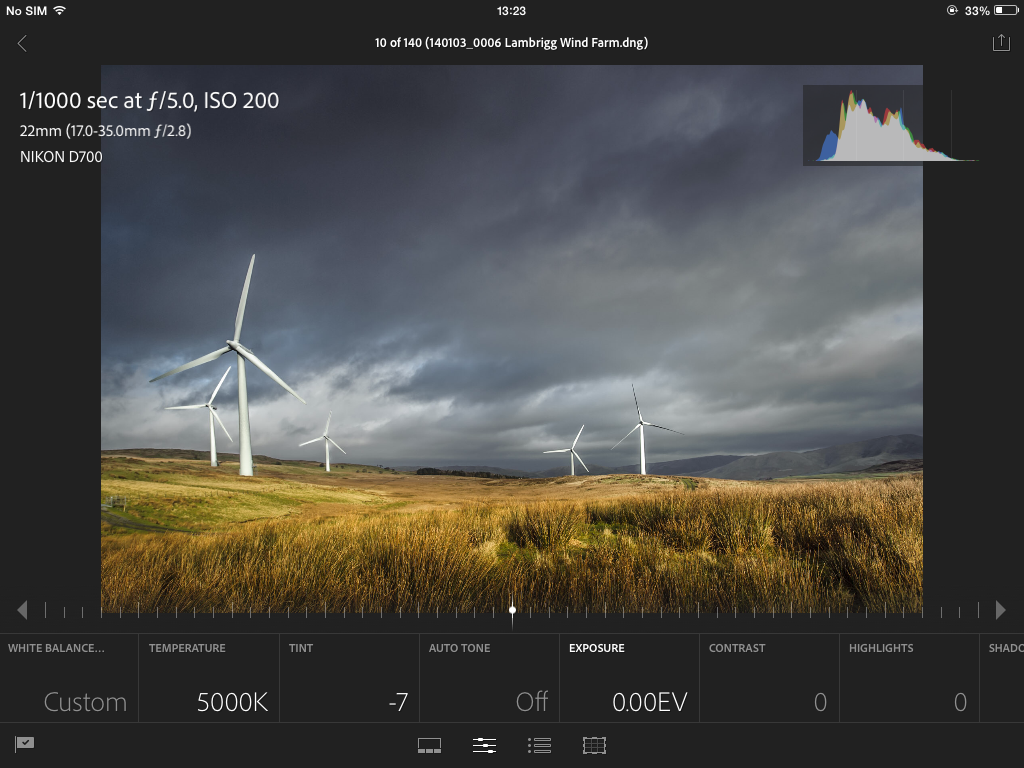
Basic panel adjustments are available by dragging the slider along the bottom of the image. In many ways it’s remarkable.
An unbalanced set of features?
I like the features that Mobile offers. You can:
- View images with the results of all the adjustments you’ve made in Lightroom Desktop
- Apply basic panel adjustments by dragging sliders
- Apply Adobe’s built-in presets
- Apply pick / reject flags
- Create new collections
- Automatically sync pictures from the camera roll (it’s how I got the screenshots here)
- Automatically sync your Mobile edits with Lightroom back to your desktop
Yet while that’s a handy set of features, I am rather disappointed that they appear unbalanced – saying it’s only a 1.0 is not that great an excuse, is it?
So what do I mean by “unbalanced”?
Well, it’s not that I expect to replicate Lightroom Desktop on the iPad. Apart from the lack of horsepower, I simply don’t think people use iPads in circumstances where they expect as powerful a range of features as on a proper computer. You’re in the pub, on a train, pretending to be sociable by sitting with the family as they watch some talent show on the television etc – and to be honest you’re only pretending not to be watching that drivel. I think it makes sense to limit adjustments to those found in the Basic panel.
And there’s plenty you can accomplish with these Basic panel adjustments and Adobe’s built-in presets. You can’t do proper B&W, or use your own presets, and the 1.0 excuse can apply to gradients and local adjustment brushwork which would seem very suitable to touch screens. But for the kind of editing you might do on the iPad, Adobe have provided a good range of adjustments.
Lightroom Mobile includes the Basic panel adjustments from Develop but only allows you to flag pictures – not rate them or apply other metadata. It’s as if if offers the features that are the most difficult to code, but fails to provide the easy stuff.
The imbalance is that you wouldn’t just use iPad time for making basic adjustments – you’d do Library as well as Develop tasks. While you’re enjoying your second pint, or when they changes channel for the other talent show, you can happily review your pictures and decide which to keep or reject. So Mobile lets you swipe up and down to apply pick or reject flags – great. But that’s all it offers.
The lack of star ratings seems a glaring omission as I think people typically use flags and ratings in concert, and it’s good that Adobe are going to add ratings. Flags identify which pictures to keep or reject, and then star ratings further refine the keepers. Coloured labels are a less serious omission, but I find it hard to explain why they aren’t there.
Similarly I doubt people would use iPads for much metadata entry. Applying keywords seems too serious for iPad time, but you can’t even edit existing captions or fix typos.
It’s all Develop, not much Library. The technically-difficult features are there, but the quick win Library features are very thin, and that’s why I continue to feel the app is unbalanced.
What good is it if there’s no colour management?
The iPad doesn’t offer colour management, so you are going to be disappointed if you expect to use Lightroom Mobile to fine tune your pictures. That doesn’t make the app useless, as I’m sure some will claim.
Mobile is for the kind of quick and dirty adjustments you do when you’re half drunk or stuck waiting for the train home. You don’t do those? Well, I don’t really believe you, or at least I don’t think you’re representative. Most people do have time away from the computer when they can make rough adjustments and try things, and it’s pretty sweet to get back to the big computer and see those adjustments have been automatically applied to the pictures. A bit of sophisticated colour-managed fine tuning and you’re done. So it’s about making the most of your time.
Slideshow
Running slideshows on the TV is nothing particularly new, and you can easily use a laptop to show pictures directly from Lightroom itself, but something I particularly like about Lightroom Mobile is using it for slideshows. Unlike the laptop, the iPad is rarely out of reach and is much less obtrusive. As I have an Apple TV, it’s just 3 or 4 swipes and the pictures are on my 40″ screen.
Mystery meat navigation
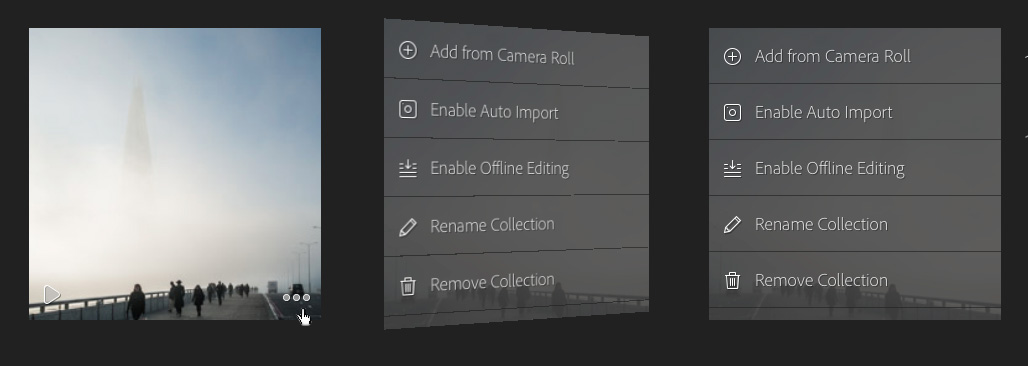
Look for the three dots in the collection’s bottom right corner. Tap them and the panel flips over and provides access to its settings. Enable Offline Editing is probably the most useful and downloads the smart previews (boiled down versions of your originals) directly onto your iPad.
I’ve always argued that Lightroom’s interface is unhelpfully gloomy, and Lightroom Mobile retains the same grey-on-grey tones.
Also, like a lot of touch apps it adopts a “mystery meat” approach to navigation. The result is that a lot of its features are harder to discover – or read – than they might be.
Learn your gestures
Lightroom Mobile, like any touch-driven interface, is driven by swipes and taps – “gestures”. So another big tip is to make an effort to learn your gestures.
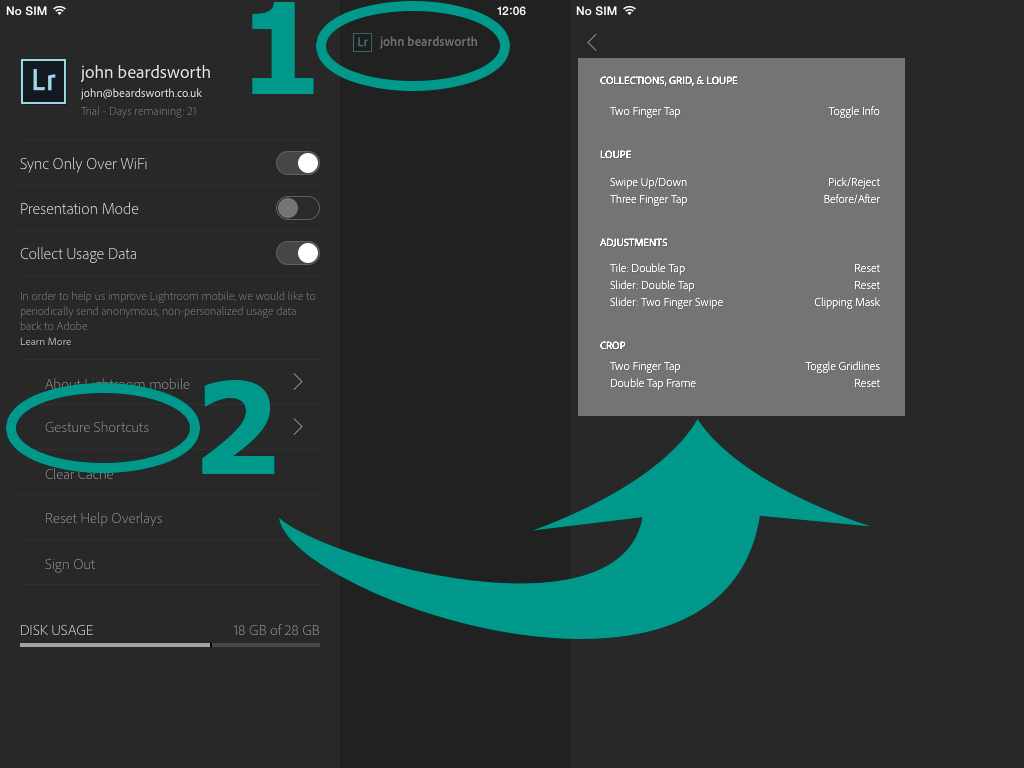
Hidden in the app’s settings is a list of gestures. You can also reset the tips here.
But this is where “mystery meat” bites back. Lightroom Mobile’s gestures are nicely highlighted the first time you use the app, but only the first time, and afterwards it’s very easy to forget the tricks and it’s not obvious where to find a list.
In fact you need to tap your account info at the app’s top left. This opens the settings – see what I mean about mystery meat – and you get access to a list of gesture shortcuts. It’s in very small grey text on slightly darker grey text, so
Where to get it
Lightroom mobile is available on the Apple App Store. You need:

 I’ve just updated my

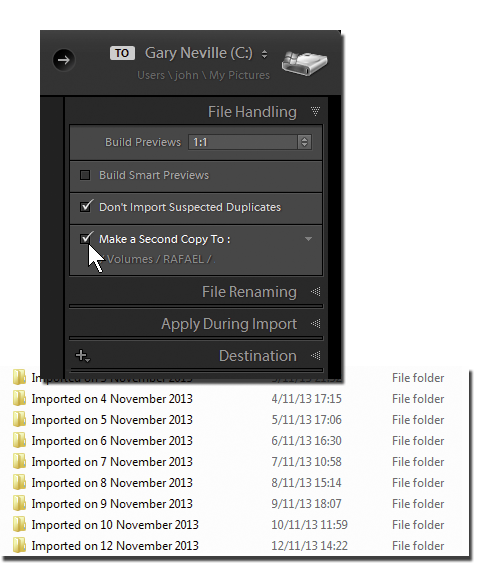 It’s because “Make a second copy to” is designed to store a second copy of your originals in a logical place, which means you’re safe to go and reformat / re-use your flash cards. What it’s not designed to be is your real, permanent backup.
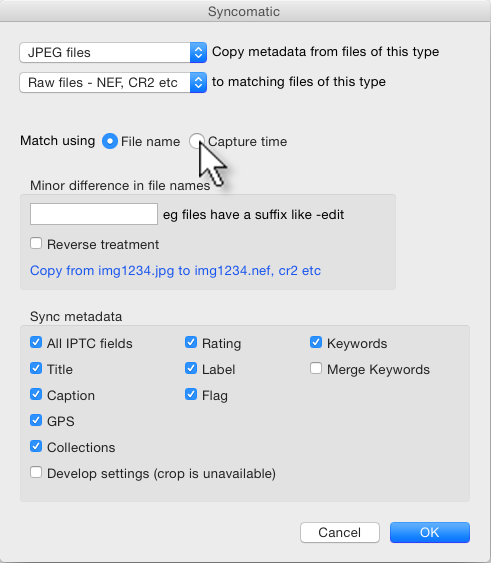
 Because it’s not needed by many people, and I certainly can’t remember when I last needed to do so. Not for years anyway, and there’s much more demand from a group of users for exporting to CMYK, for example.


 I’m really not surprised he found it difficult. I thought I knew my way around Adobe’s site and I don’t think they have deliberately hidden links to CS6, they’ve not gone out of their way to make it easy to download if you already own the software. It took me a quarter of an hour flapping around, looking at “my products”, following various CS6 links, and getting nowhere. Eventually I found it:
 Photoshop CC’s subscription will now be $9.99 / £8.54 per month and will include Lightroom, plus the 20Gb online storage space and the Behance web service. The monthly price is not a first year introductory discount but will be your normal price so long as you keep subscribing. Any subsequent price rises will be based on that figure.