ListView 2 – beta
A new version of my ListView plugin is coming, and you can try it now.
The original ListView plugin was written when I was first learning the Lua programming language which Lightroom uses. As the years passed this made it harder and harder to update, even with little changes like supporting new fields or fixing small bugs and oddities. Once or twice I considered bigger updates and even began rewriting whole sections of the code, but these efforts never went anywhere. People had built workflows around ListView, it worked well for them, and the plugin remained popular – so I left it alone.
But I was never happy with the situation, and it really wasn’t doing all the things I knew it should be able to do.
So in late-2024 I began preparing a version 2 of ListView with the benefit of a decade’s hindsight of how people use the plugin and much more experience coding for Lightroom. I rebuilt the plugin from the ground up with totally-new code, and included features tried and tested with my other plugins.
In summary, version 2’s objectives are to:
- ensure people can do everything they did in version 1
- reflect how people used ListView more for export than I’d expected
- Mac users can now export to Numbers (as well as Apple permit!)
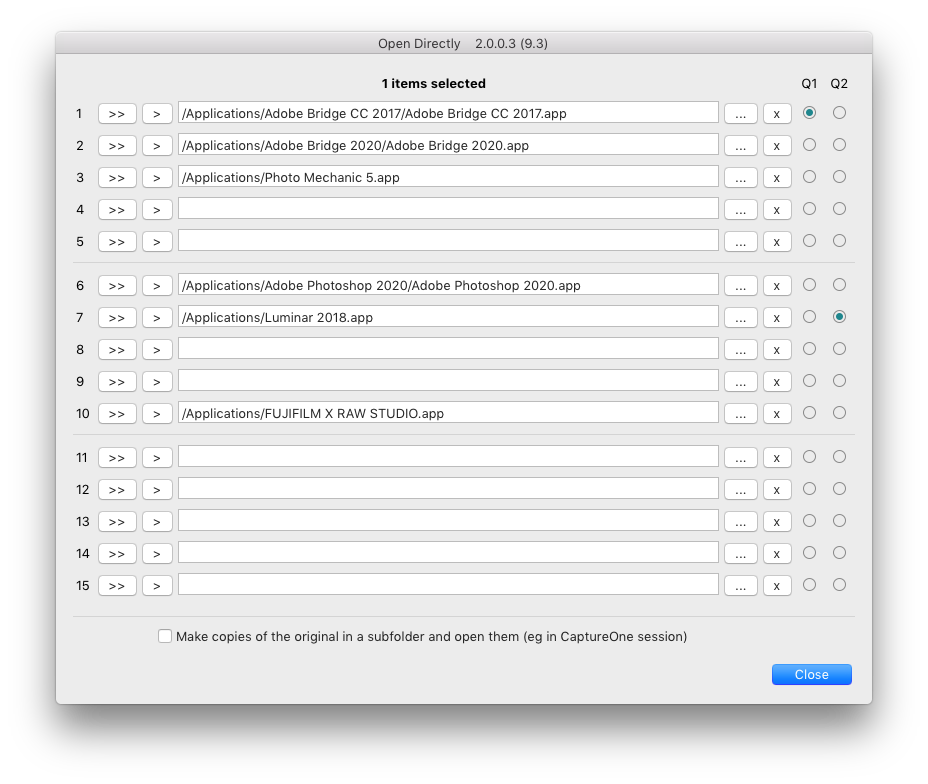
- It’s possible to set up two more external editors
- encourage users to use ListView as a list view for Lightroom, which was how I originally thought it would be used
- add big new capabilities:
- importing spreadsheet data from Excel or Numbers
- in-cell editing
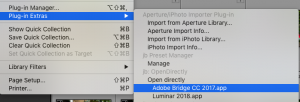
I plan to release it soon. But try it now and please let me know what you think. Also see below:
- Known Issues – especially on Windows 11
- Installation recommendations

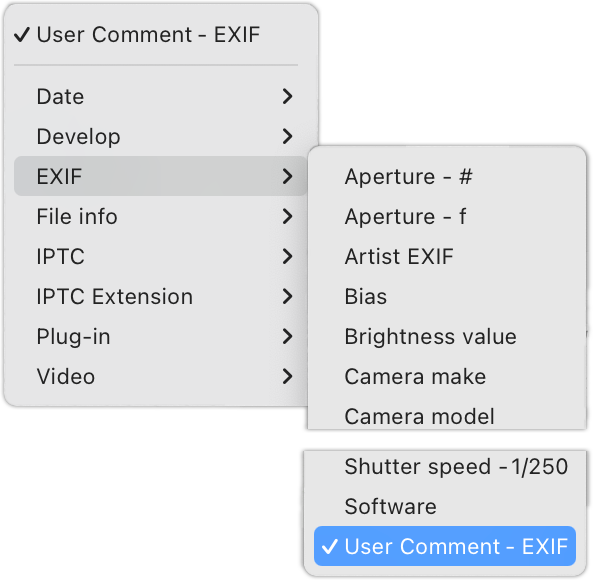
Instead of going into a separate dialog box, you can now change columns by choosing from these drop down menus
Version 2 Highlights
- Existing ListView workflows should be unaffected and you should be able to continue doing what you’ve been doing, but with more flexibility, more fields, more efficiently
- Columns
- Up to 20 columns of data, double what was available before
- Change the field shown in any column by choosing from my standard field choice drop down lists
- Set column widths more flexibly by setting the default and then making some fields double or triple width
- Delete columns or move them left and right
- Export features
- Two additional external apps can be configured
- Export CSV and TXT to Numbers (Mac only)
- Export Thumbnails begins automatically in the background whenever you start the plugin so all the thumbnails are already generated and in ListView’s cache, ready when you export to Excel or a browser
- JSON export available
- Metadata editing
-
-

The updated edit window now lets you edit multiple image
ListView 1’s one-image-at-a-time dialog remains
- Premium registration code makes new editing features available
- Edit directly in cells
- Select multiple photos and apply edits
- Auto-complete gets suggestions from other images, other fields, your metadata presets and custom lists
- Apply metadata presets
- Import spreadsheet data
- Export a defined format from ListView
- Edit values in Excel/Numbers
- Import this spreadsheet by copying and pasting
- It’s not a generic import feature – for that you need LrTransporter
- Changes are immediately displayed in the ListView window and saved to the catalogue
-
-
- Quick Access URLs
- You can launch the plugin and a preset by calling a URL like lightroom://uk.co.beardsworth.listview?preset=MyExport
- URLs can be set up in third party keyboard consoles

The premium editing features greatly expand ListView’s use to update metadata
Installation
I suggest renaming the old ListView in Finder / Explorer, and putting the new ListView in the same location. Definitely restart Lightroom before using it. If things go wrong, just reverse these steps.
Beta Updates – important
ListView 2 isn’t part of the Auto Update process and I may update this beta after I’ve made significant changes to the code.
So I recommend returning to this page every so often and checking the build number (top right).
Just use it and let me know
I really welcome feedback on this.
At the moment my mainngoal is that the plugin’s new version has capabilities equivalent to those in the old code. Completely-new features are a lower priority.
Known Issues

Windows 11 alignment problem
There was a problem on Windows 11 with column widths and alignment (see right). It looks like text isn’t wrapping onto extra lines and instead is bumping all the other data to the right. As well as Mac, I run Windows 10 and it doesn’t happen there, so please look out for this problem.
On Mac, there is an unusual problem sending data with thumbnails to Excel – sometimes it doesn’t display the thumbnails. For some reason, this works best if Excel is already open before you export data with thumbnails to it.
Future of version 1
If all goes well I may remove it, but I may just leave it there as it does no harm. Just in case I make up my mind though, I’d suggest you learn to use the new dialog and let me know if it doesn’t let you do what you did before.
Pricing
Registration codes have always been “lifetime” – ie updates are at no cost.
The in-cell editing and import from spreadsheet features will be a premium extra, at the same price as ListView itself. These are completely new features which not everyone will want, they were never offered in ListView 1, and lots of my time went into the update. I don’t feel I’m being unfair by charging for such substantial extra capability.
Roundtrip to Excel (or Numbers)
ListView’s import feature “<> Excel” is specifically designed to extend ListView’s features so you can export data from ListView to Excel or Numbers, make changes, and reimport them into the catalogue. It is not intended to be a generic tool for importing metadata.
If you need a generic and much more-flexible import tool, I recommend LrTransporter from https://photographers-toolbox.com.
This shows <> Excel in use, exporting data to Excel, editing the title field, and bringing it back into Lightroom.


 Here the crucial details are:


 In some cases you may not want or be allowed to publish any AI-generated content in a photograph, but it can be hard to remember if you’ve used that feature. So notice that you can now filter on photos that contain AI generated content.
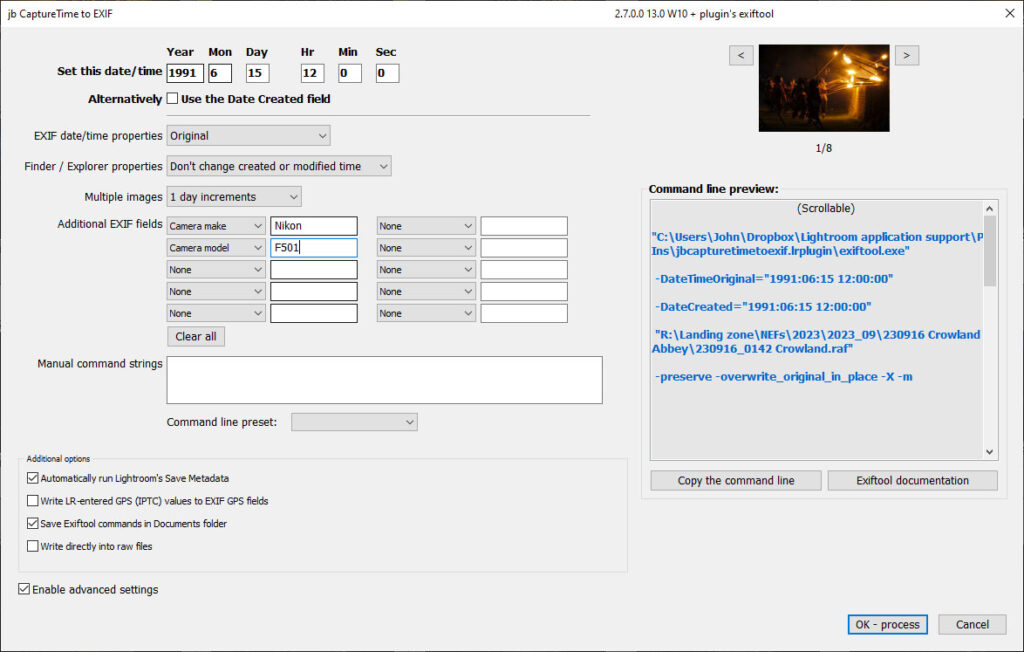 I’ve recently added a couple of new features to my Capture Time to EXIF plugin (
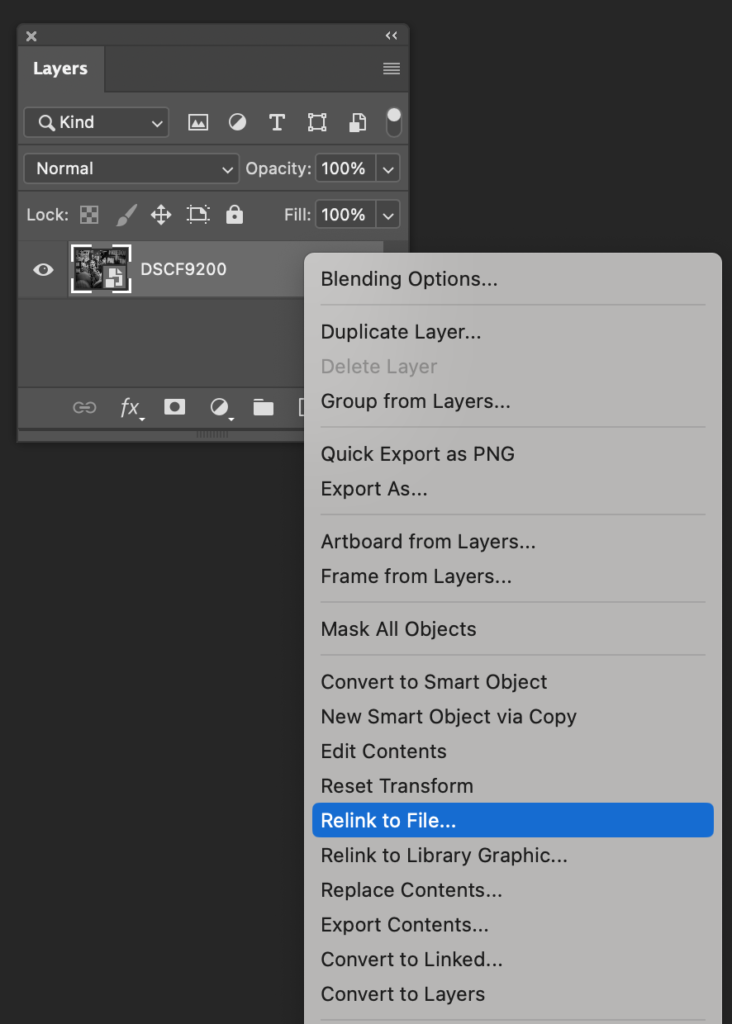 Is there an option to create a linked smart object instead of an embedded one when exporting a photo to PS?
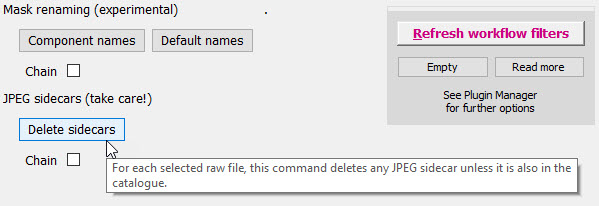 Rename masks from “Mask 1, 2…” to reflect what they contain, so “Lin Lin -Rad” is a mask which contains two linear gradients and one radial which is set to Subtract. It’s disabled by default, but I find it makes the Masks panel a bit easier to read.