This option was there before, but now it does something
Lightroom’s 7th incarnation – the so-called Lightroom Classic – introduces a new Embedded & Sidecar workflow which is designed to let you review, compare, and cull reject photos much faster than before. The key points are:
- It’s for anyone with too many photos, too little time
- You must select Embedded & Sidecar in the Import dialog
- Lightroom imports the photos and builds its previews from the embedded previews or….
- If the embedded preview is less than 50% of the raw file’s resolution, Lightroom will try to use a sidecar JPEG
- It’ll look like the image from camera’s LCD
- This lets you zoom in on photos or move from one to the next much quicker
What are “embedded previews”?
You may already know that every raw photo contains one or more JPEGs that the camera has written inside the raw file.
These “embedded previews” are what you see on the camera’s LCD or in the electronic viewfinder, if you are using a mirrorless camera. You briefly see these embedded previews in Lightroom’s Import dialog too, until Adobe’s own raw conversion takes over.
But since Lightroom’s early days, many photographers have wanted Lightroom to display these embedded previews in Library. That’s because embedded previews:
- Are usually good enough for you to decide if a picture is a keeper, or is destined for the bin
- Can be reviewed much faster than converting and displaying the raw data
What these people have been wanting is “PhotoMechanic speed”. PhotoMechanic is an image browser that takes full advantage of the embedded previews. It does only a few jobs, but it does them very well and very quickly, and this speed has earned it a loyal following among press photographers and others with lots of pictures and little time. The frustration has been that everyone has always known that should be possible in Lightroom. Finally Adobe have responded.
So how do you take advantage of this change?
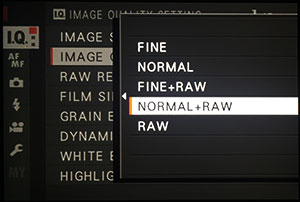
- Decide if you should switch to shooting Raw + JPEG
- Import photos with the Embedded & Sidecar option
- Try to avoid making adjustments until you’re done reviewing and culling photos
Should you shoot Raw + JPEG?
I strongly recommend you review your camera(s) to see if changing to shooting Raw + JPEG would make the most of this new Embedded / Sidecar Preview (ESP) workflow.
On my Fuji camera I have switched to using Raw + JPEG. On my Nikons I haven’t because their embedded previews are full resolution.
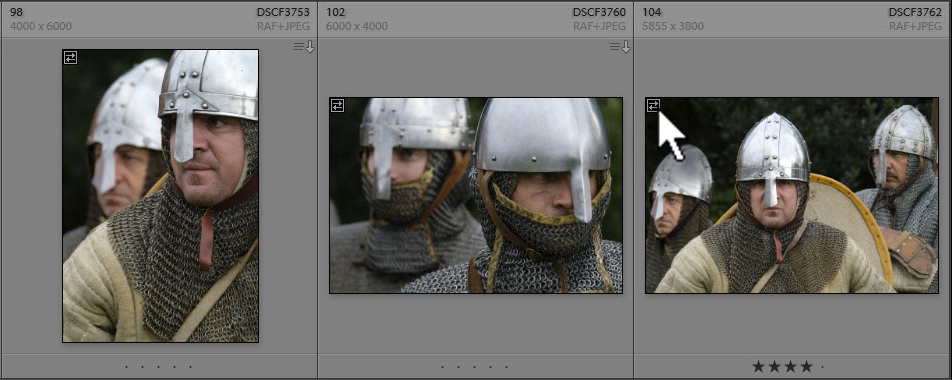
In the past I never liked shooting Raw + JPEG, but this has now changed – at least with one of my cameras. The key issue is the size of the embedded preview
To explain, my newest camera produces raw files with a resolution of 6000×4000 pixels but with an embedded preview of only 1920×1280 pixels. The problem is if I want to zoom in to 1:1 in Lightroom, to check the focus or fine detail for example. Because the embedded preview isn’t full resolution, Lightroom then has to load the raw file and I lose the speed benefit of using the ESP.
Lightroom anticipates this possibility. If the ESP is less than 50% of the raw file’s full resolution, Import will look for a full resolution “sidecar” JPEG. So this camera – a one year old Fuji X-T2 – is now set up to shoot Raw + JPEG.
I still don’t like having two files for every photo, and it would be great if Fuji did a firmware upgrade to allow full size embedded previews, but it’s worthwhile for the faster ESP workflow.
What you need to find out is if your camera writes an embedded preview that is full resolution. In general:
- If you use a recent DSLR from Nikon, Canon etc, there’s probably no point changing to Raw + JPEG. To the best of my knowledge, raw files from these cameras do contain full resolution embedded previews.
- If you use a mirrorless camera such as Fuji or Olympus, the embedded previews are generally not full resolution and you may want to start shooting Raw + JPEG.
- When you see a “Loading” message when zooming in, it could be because the embedded preview is less than full size.
When you import, choose the option Embedded & Sidecar
Once your camera is set up to take advantage of the ESP workflow, the key step is when you import new photos.
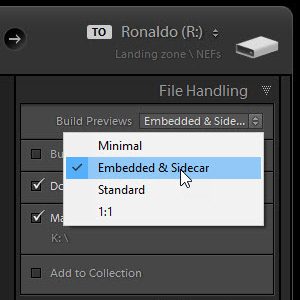
Make sure you go the Import’s File Handling section at the top right of Import and choose Embedded & Sidecar from the Build Previews drop down box.
If you forget to choose Embedded & Sidecar, Lightroom will import the files as in the past. You just won’t get the ESP workflow unless you remove the photos from the catalogue and reimport them with the correct Build Previews choice.
To help ensure you always choose Embedded & Sidecar, one tip is save your Import settings as a preset. This is done at the bottom of the Import dialog, and you can save other standard settings like a copyright metadata template or renaming options.
What should you see?

You should see “Fetching Initial Previews”, not standard or 1:1
Initially you should see a message about Fetching Initial Previews (rather than standard previews). One important thing to know is that extraction of the first embedded previews should begin immediately, so you can zoom in and examine earlier pictures while the rest of the import is proceeding.
As thumbnails appear, look for a new badge which should be on every thumbnail. If it’s not there:
- one possibility is that you forgot to set the Embedded & Sidecar option in the Import dialog
- Another is a bug in what’s a new, fragile feature
- If you really want your ESP workflow, removing and re-importing is your only option
I don’t like the Raw + JPEG workflow but have adopted it for this camera because the embedded previews are low resolution.
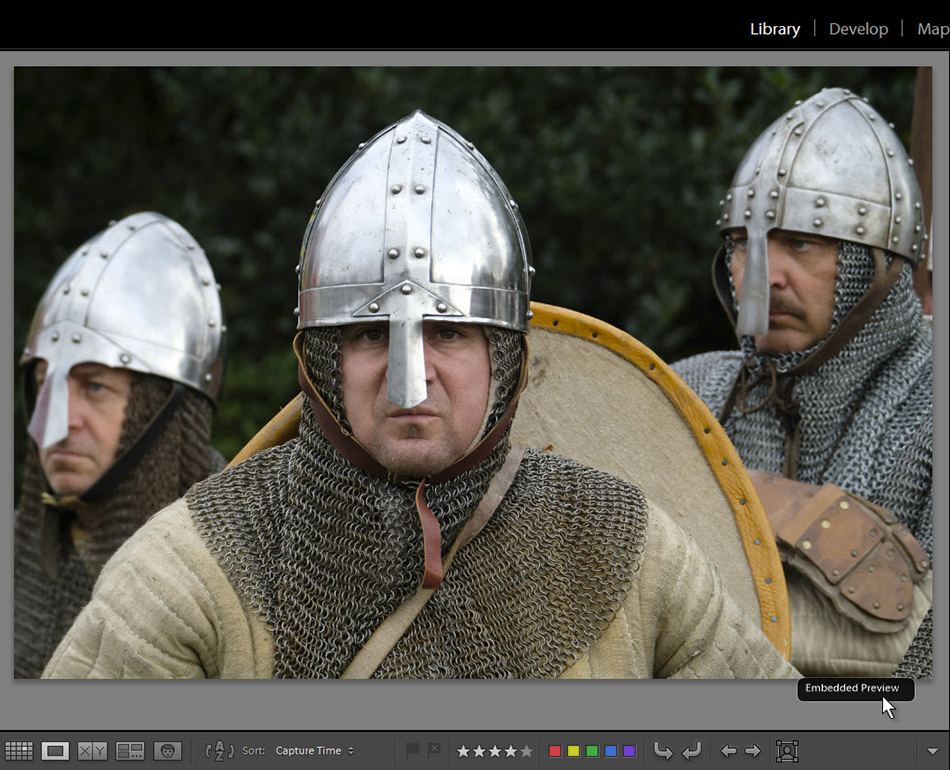
In Loupe view, you will also see a bezel “Embedded Preview”. If not, see the above suggestions.
If you see “Loading” messages
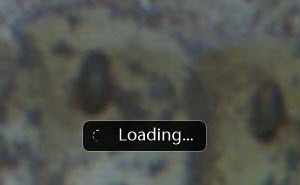
This usually means:
- You didn’t set the Embedded & Sidecar option in the Import dialog
- The embedded preview is lower resolution than the raw file, so you may want to shoot Raw + JPEG
- You have adjusted the image….
What if you adjust the image?
I welcome this ESP feature and find it very helpful reviewing and culling new photos, but it has an obvious weakness when you need to adjust an image before you can decide whether to keep or bin it.
The current ESP workflow is great for normally-exposed pictures (eg sports in daylight) but not when your work involves less-flat light (eg stage performance, sunsets) when you just can’t judge an underexposed image properly because it’s too dark, or you need to pull back the highlights or open the shadows to see if any worthwhile detail is present. Speed’s no use if you can’t see well enough.
Quick Develop was designed for this comparison and culling process, letting you bump a few key characteristics so you could choose between images or see if one may be a keeper. But using it with ESPs comes at the price of loading the raw data. We really need to be able to apply some QD adjustments to the ESP-derived thumbnail/preview so that the user can properly compare and cull images at speed. Just Exposure, Highlights and Shadows would be enough.
I hope Adobe will implement this idea, but I am not holding my breath….
Other tweaks
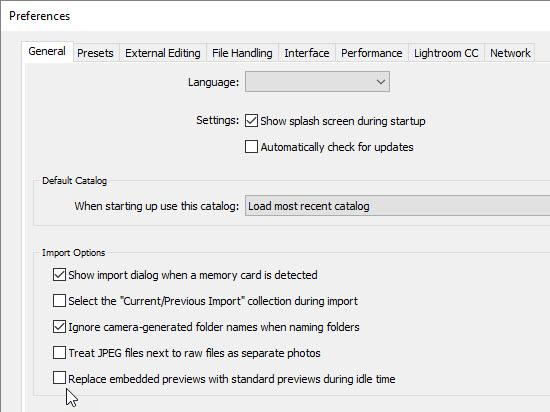
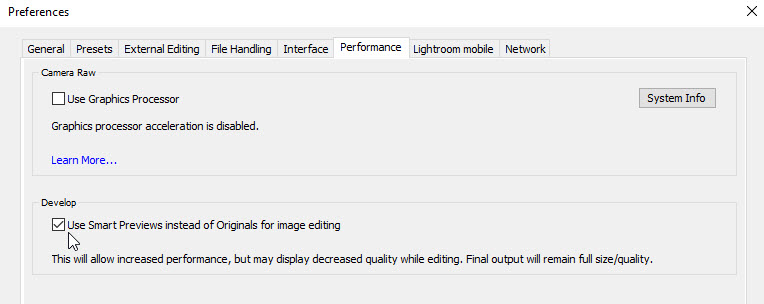
As part of the new version’s performance tweaks, there is a new item in Preferences – “Replace embedded previews with standard previews during idle time”.
The option does exactly what it says. When you aren’t doing anything in LR, it will quietly replace the embedded previews with standard previews. In other words, the embedded previews are only replaced with standard previews. It doesn’t build the 1:1 previews which are so useful when you zoom in.
So while this option may have its uses, it’s not too helpful for a hardcore ESP workflow. I recommend disabling this option.
Incidentally, I also recommend unchecking the option “Treat JPEG files next to raw files as separate photos”.
Conclusion
Lightroom 7 or “Classic” is all about performance improvements. The need for the mother of all bug fixes crept up on us, a bit like the tale of how to boil a frog where you only heat the water slowly so it has gone to sleep before it’s too late to escape the danger. Many of us didn’t experience the performance problems that caused others so much pain. In my case, I had no sense of slowdowns until finding that processing the Fuji X-T2’s 24mp raw files was much slower than my Nikon D800’s 38mp NEFs.
Performance fine tuning is likely to be a continuing effort, and I see remarkable speed benefits generating standard previews – 4 times as fast as Lightroom 6. The Embedded & Standard Previews workflow is a big element of that effort, targeting performance at a time when you need it most. I hope you found this useful.
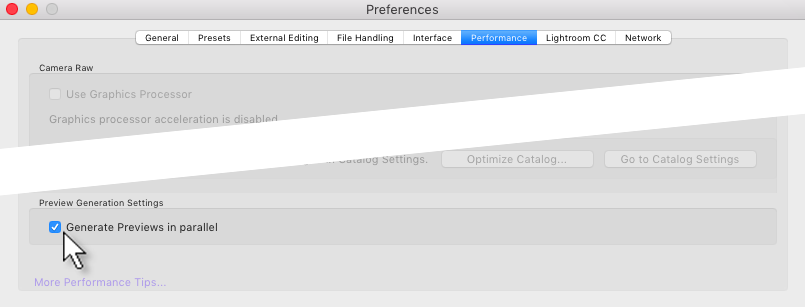
Make sure this is enabled – it can have a dramatic effect on preview generation speed.

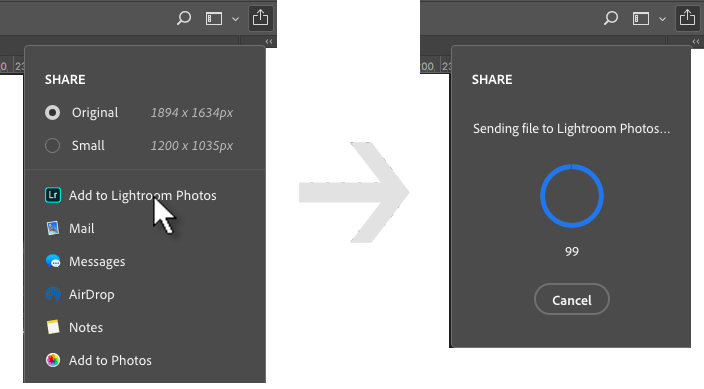
 If you’ve not shared a collection before, here’s how:
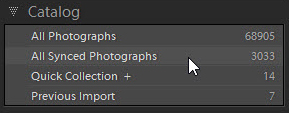
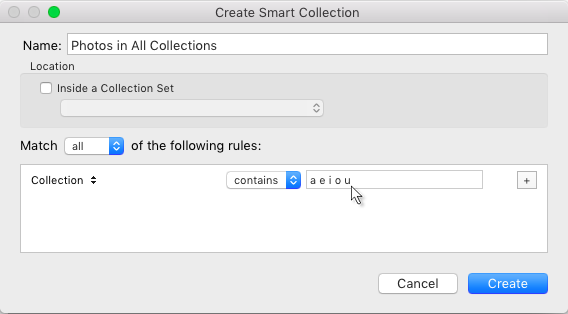 Create a smart collection


 So in 2015.6.7 they’ve introduced an option which facilitates a workflow based on smart previews.
 Two small but important bug fixes are in


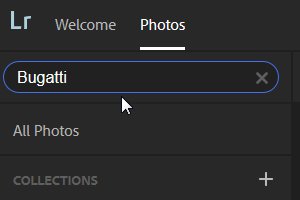
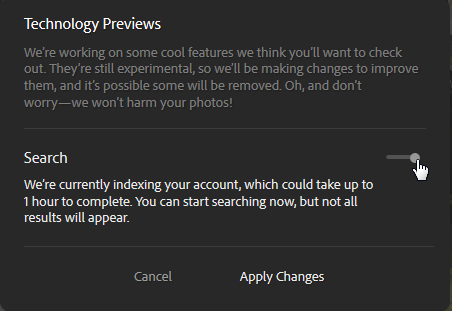 Note that the slider next to “Search” isn’t a bit of decoration as I thought at first. It’s what they mean by “Toggling Search”, so you drag it to the right to enable the feature. Then Apply Changes and you should have the Search box.