Lightroom and 32 bit HDR files

There’s an interesting new feature in Lightroom 4.1 Release Candidate 2 – the ability to adjust 32 bit HDR images in Lightroom.

I confess I’m not that big a fan of HDR and I don’t play with it often, but this picture is a good example of when I might use it. The component frames were taken last month in the Lake District near “our” village, Rosthwaite. These have been my favourite trees since I came across them early on a misty Christmas morning 5 years ago and on my recent visit, as you can see, there was a huge contrast range and the clouds were extraordinarily bright. It was an obvious HDR scene.

So I shot 5 frames at 1 stop intervals, beginning at – 3 1/3 stops. The camera is a Nikon D700 and I was shooting raw files. Back at the house, I did minimal preparation work in Lightroom – just dust spotting – and a couple of Library tasks:

  • set the colour label to green
  • stack them

I do these because there’s always a risk that during the culling phase of my workflow I’ll mistakenly decide that a frame is badly-exposed or badly-composed, so the green reminds me that it is intended to be part of an HDR or panorama.

But until today I didn’t do anything else with the pictures – I don’t want to have folk thinking I’m getting into HDR!

So, what’s the new Lightroom workflow?

  1. Select all the frames in Library
  2. Choose the menu command Edit In > Merge to HDR Pro in Photoshop.
  3. In Photoshop’s HDR Pro dialog, I then set it to 32 bit output
  4. I placed the white point on the very brightest part of the clouds, and clicked OK
  5. I didn’t do anything else in Photoshop except saving the file as a 32 bit TIF
  6. Back in Lightroom, the 32 bit TIF was catalogued automatically
  7. Adjust it in Develop.

As well as overall and local white balance, I changed some Basic panel values  and produced the final picture below.

It does make me wonder. I did so little to this picture in Photoshop other than run the HDR Pro dialog, so how far are we away from doing the HDR process entirely within Lightroom….

Aside:

Another curious detail is that once the 32 bit HDR file is back in Lightroom, you can use Library > Convert Photo to DNG to change the TIF to a DNG 1.4 which supports 32 bit floating data. \

Why you would do this is less clear to me, because you would lose the flexibility to process it as a 32-bit image in Photoshop (DNG means it would be sent to Photoshop as 16 bit).

But for a long time I’ve done something similar with JPEGs from a point and shoot camera and from my iPad. Converting these files to DNG distinguishes the original photos from derivative JPEGs which I might have generated for email, web etc. So packaging these HDR-merged TIF files as DNGs would also mark them out as pseudo-originals, and would also permit Lightroom to update their embedded previews.


List View plugin updated

I’ve now released version 1.57 of my List View plug-in. The main changes are:

  • Thumbnails are now displayed in Lightroom 4
  • Export to CSV format – better for anyone who uses the Numbers spreadsheet or for data exchange with databases
  • Close to Sorted Collection button. One thing people like about the plug-in is sorting by almost any field, so this button saves the selected images into a new collection in their sort order – you just have to change the collection’s sort to User Order.
  • Exported data can now include thumbnails.


The button to export the thumbnails is separate from the buttons to export the HTML text. This is because text export is very quick, while exporting thumbnails takes time. So you might export the thumbnails once, but then do more than once export of text, for example with different columns.

“Readable and inspiring”

From the North Korean leadership school of modesty, here’s the first review I’ve seen of my Advanced Digital Black and White Photography. It’s from last week’s Amateur Photographer and is short and sweet – the book’s “readable and inspiring”.

Like the first edition, it is an end-to-end treatment of the subject from camera to print. In between it covers every known method of doing black and white in Photoshop, but most of all it tells you which ones are now best forgotten, and why.

The first edition was bang up to date when it was first published and so was the first book on B&W to feature Photoshop CS3’s B&W Adjustment Layer – as well as Lightroom and Aperture. That content is now updated, and there’s a lot more material on Lightroom and Silver Efex Pro.

It now seems to be available at Amazon UK and Amazon US, and translated versions will follow – including Korean.

FTP directly from Lightroom

Can I upload files from Lightroom by FTP?
Yes, the Lightroom SDK contains an FTP plug-in which works perfectly well. From the sample files, file the folder “ftp_upload.lrdevplugin” and put it somewhere on your system (I keep plug-ins in a folder on Dropbox so I can access them from various computers). Install the plug-in and then do an export. Choose FTP Upload in LR’s Export dialog box, and point to the FTP Server or create an FTP preset and select it.

This free plug-in does the job so well for most people that at least one unscrupulous preset site rebadged it and asked money for it! I just wish Adobe would simply add this plug-in to the standard Lightroom installation.

15-2-13 09-13-38

iPad via InDesign

If you’re an InDesign user, you may have heard that version 5.5’s main changes were for publishing to the iPad. So you may be interested in Terry White’s latest Adobe Creative Suite podcast Lightroom to InDesign to iPad: Interactive Portfolios where he shows you how to take HTML exported from Lightroom’s Web and use it in an InDesign document which you then publish to the iPad. You can use any HTML gallery exported from Lightroom.

It’s pretty well the same route that I took when I wrote here about an app I’d been creating (the screenshots show some HTML animations which had been used in InDesign) and in other experiments or presentations since then. It’s perfectly doable, if you’ve got all the software, some InDesign skills and the time to figure it all out.

Extract preview images

There’s a script on Adobe Labs to extract as JPEGs the thumbnails and previews that you see in Lightroom 4:

Sometimes, lost or deleted photos in Adobe Photoshop Lightroom 4 still display a preview. This script allows you to extract and save those previews.

The script extracts previews for all the images that are selected at the time you run the script. It extracts poster frames for any video clips that are selected at the time. You can choose a location for these files. The previews are in JPEG format, and the name contains the size of the image, for example: _MG_0233-360×240.jpg.

Also see Jeffrey’s “Extract Cached Image Previews” Lightroom Plugin.

Moving from LR3 to LR4

If time was not a concern, and if your goal was to maximize image quality, what would be the best practice for moving images from LR3 to 4?

You do understand you don’t actually move images? You just open your catalogue in LR. Images processed in LR3 will still have LR3 adjustments and a little exclamation mark which you click if you want to update their adjustments to LR4’s “process version 2012”. But you can leave the existing images as they are in “process version 2010”. I would do this in general, leaving them as they are, and just update specific images – eg those which might benefit from better treatment of highlight recovery. Meanwhile, become familiar with the new adjustments by processing new images.

Lightroom 4

I suspect anyone reading this blog already knows, but Lightroom 4 came out today. After previously having to be a bit coy about Focus, I’ve been presenting it all day at the Focus on Imaging show and will be tomorrow too –  see the schedule here. And just look at the pricing – £60 for the upgrade, £104 new.

Here’s a quick link to all my Lightroom 4 posts.

Kensington tonight

I’m heading to the Nikon Owners Club in Kensington for an evening of Blurb and Lightroom, and just hoping to provide a presentation that will take their minds off D800s and D4s.

On behalf of Mike Eleftheriades and the Nikon Owner (London Group) we are pleased to invite you to the next Nikon Owner (London Group) talk “Self-Publishing Evening, in association with Blurb UK”, with Teresa Pereira and Rachel Stanley from Blurb UK & Lightroom expert John Beardsworth. The event will be held on Friday, March 2nd 2012 at Kensingtonrooms.

Join us for the ultimate guide to self-publishing. The presentation will provide a quick and easy overview of Blurb’s bookmaking platform, bookmaking tools, and how to market and sell your book. Come along to see the latest ‘Photography Book Now’ award-winning books for inspiration. We’ll also have samples of Blurb’s ProLine papers, end-sheets and linens on hand.

Learn how to use Blurb’s bookmaking platform to make professional bookstore-quality printed books and ebooks. In addition, we will be demonstrating the new Book publishing module built into Adobe Lightroom 4, which directly interfaces with the Blurb bookmaking service.

All attendees will receive a free Blurb bookmaking voucher worth £30.

There are more details here.

Lossy DNG – too early?

Adobe [are] offering new reasons to get DNG religion, writes Stephen Shankland in this fine review of the new options for working with DNG in Lightroom 4 beta and Photoshop CS6. One option is fast load data, which helps Develop kick into gear faster each time you take a picture into it, and the much more controversial possibility to create lossy DNGs :

Lossy DNGs… throw away data to produce a file size something like a quarter the size of a regular lossless DNG. To do that, Adobe demosaics the raw data so that strictly speaking it’s not raw anymore. More alarming to some, the original 12-,14-, or 16-bit raw data has been boiled down with the JPEG algorithm to 8 bits, meaning that there aren’t as many gradations of color values.

But Adobe didn’t just make an ordinary JPEG. First of all, the eight bits of data are carefully distributed according to each image with a “stretched” tone curve, Chan said in a forum post. Second, Adobe “dithers,” which means it carefully adds a little noise when moving to 8-bit values, which can actually improve the appearance.

And unlike JPEGs, the lossy DNGs preserve much of the flexibility of raw, such as the ability to change white balance, keep a wide color gamut, and recover overexposed highlights, Chan said.

But while Adobe likes the lossy DNG option and believes some will enjoy its more economical storage demand, it doesn’t suffer the illusion that it’s for everybody. “It’s not a default nor an option for everyone,” Hogarty said. “However, I know that a number of photographers shooting time lapses in a raw format or looking to archive outtakes in a more compact format will appreciate the flexibility.” And some could use it as an archival format for second-tier photos.

There are obvious benefits

  • faster-loading data
  • taking lots of pictures on the road
  • saving disc space by compressing frames shot for timelapses

Risks

But there are also risks from allowing DNG to be something other than a simple alternative to raw files.

Top of my concerns is that risk of confusion – you need to be very careful to be able to distinguish between full-blooded DNGs and lossy ones. For example, it would be very easy to create lossy DNGs for some good reason but then confuse them with the real negatives. Let’s say you take a lot of lossyDNGs on the road and do some keywording. You then come back, copy the lossy files over to your main computer and accidentally overwrite non-lossy DNGs. Even if you have a backup of these full quality DNGs, you’ll still be wasting time and energy sorting out the mess.

Reducing risk

A couple of features in Lightroom 4 are helpful in managing these lossy DNGs:

  • Library’s filter panel’s File Type now distinguishes between the different types of DNG
  • You can examine individual images in the Metadata panel’s DNG view.

But outside Lightroom, you may not be able to see lossy DNGs at all until other software catches up, and in Explorer / Finder the only indications that you’ve got a lossy DNG may be its file size and that the thumbnail doesn’t resolve (at least until an OS update).

Why might you choose to keep lossy DNGs?

For anything I do, I have no particular reason to create lossy DNGs. Sean McCormack seems to have decided differently and is using lossy DNGs to save disc space by compressing the original photos which he used to create timelapse movies. Personally, while I do some timelapses too, I’d start from the principle that if something is worth keeping at all, it’s worth keeping in its full richness. If that means I need more storage space, so be it.

Hitting the wrong target?

While I would take a different view from Sean, I don’t deny that frames shot for timelapses cause difficulties. I just think that in offering space saving DNGs, Adobe haven’t addressed the real problem – managing these files.

Storage space is cheap, but let’s say you decide to compress 4Tb to 1Tb and saved all that money, you still face the question of hundreds of individual files cluttering up your system. For example, do you leave them out of Lightroom and just remember in your head where the files are? Or do you keep them under control in Lightroom and keep finding them popping up in smart collections and filter results?

It’s this management problem that I wish Adobe had solved, maybe with a mechanism to store all these “component” frames in a single zip or package file – a kind of multi-image DNG. So in addressing the problems of multi-frame techniques, I’ve got to say that I think lossy DNG formats is the wrong solution.

More precautions

Even if I did decide to save these files in this lossy format, one thing I would certainly be doing is taking a few extra steps.

Confusion is inevitable when some DNGs are full quality and others are debased. Unless you can readily distinguish them, there’s a serious risk that sooner or later you’ll save some lossy DNGs thinking they are full res. It might be merely embarrassing, just like when I put lossy DNGs on my laptop before I delivered a Book demo and had to explain the horrid messages about the images being too small to print properly. Or you might succeed in overwriting the full quality files.

So if I ever used the lossy format option, I’d probably be adding a filename suffix to every lossy DNG. Then, no matter what app I am using, I would then be able to readily distinguish the full blooded DNG “120210_0123 Blea Tarn.dng” from its lossy counterpart “120210_0123 Blea Tarn LSS.dng” (in fact I wish Adobe had used a new extension like DNGL).

Conclusion

Sure, these DNG developments are broadly positive, and in one sense I am already taking advantage of the lossy format by saving the few JPEGs I shoot with my iPad as sensibly-sized lossy DNGs rather than the old swollen 16 bit files.

But I do think you should not dive blindly into these waters. Lossy DNG offers new capabilities and potentially-useful workflows, but it also opens up big risks to the integrity of our picture collections. Where we are right now, are those risks outweighed by substantial, tangible workflow benefits? For me, no, certainly not yet….

Here you see how easily lossy and full-blooded DNGs can be confused – especially if you don’t do something like add a suffix to the filename. I might even start adding a coloured label as an extra way to distinguish them.

Locktastic 1.25

I’ve just released a revision to my little Locktastic plug-in which is designed to help photographers who “lock” certain pictures in the camera. Some do this to identify pictures they particularly want to work on when they get back to their desks.

As a result of a user request, the plug-in now bypasses Lightroom’s Import dialog and imports only those images. I’ve added a new menu item “Import read-only images” which prompts you to point to a folder. the plug-in then imports all read-only files found in that folder and its subfolders – no metadata or develop presets are applied.

Seven (almost) random Lightroom 4 quick tips

As you play with Lightroom 4, there are lots of small features you may have overlooked. Here’s a brief run through of some of my favourite tweaks:

1. Try dragging any folder into the Collections panel. Lightroom 4 creates a new dumb Collection, and any stacks that were in the folder are repeated in the Collection.

2. Ever want to duplicate a Collection or a Smart Collection? It’s now very much simpler – hold down the Alt or Option key, and drag it to another position in the Collections panel. You can shift select multiple items too, and even copy entire Collection Sets using this method. Copying Sets is a bit fiddly though, so I may do a short video showing how to do it.

Use the mouse wheel to scroll through images on the map

3. On Windows,  you can now move more than one folder at a time by dragging and dropping. As an Adobe engineer put it, this was an old bug that had been deferred one time too many.

4. In the top panel (F5) you can now right click the module names and hide those you don’t want – a silly idea in my view but someone’s bound to like it!

5. In Books, to globally change a book’s font, switch to grid view and choose Edit > Select All Text Cells. You can then change the font in the Type panel.

6 Emailing directly from Lightroom was much requested and has now been implemented, though to use a cricketing term it’s a bit “agricultural”. A dialog box appears and you can type a message and type email addresses, but you can’t choose email addresses directly from your computer’s address book – it’s not integrated. Theoretically you might start building up an email address list in Lightroom, or even export data from your email software and hack the Lua text file Lightroom uses to store its list. But you don’t need to do any of this – just hit Send and don’t enter any email addresses. Depending on your email program, Lightroom then opens the email in your email program and you can then use its address book.

7. When you click a flag on Map, Lightroom displays a popup with the first image at that location. Clicking the forward and backward arrows is the obvious way to move through the pictures tagged at that GPS location, but there’s an easier way. Move the cursor over the popup’s thumbnail – you can now use the mouse’s scroll wheel or similar wheel on a tablet to scroll through the images.

How can I copy a folder’s stacks to a collection

QIs there a way to move stacks of images into a collection and have those stacks retain their original stacking “formation”/order?

ADrag a folder and drop it in the Collections panel. LR4 creates a new collection with stacking which matches the folder.

Slideshow – and Lightroom 5….

There have always been some pretty obvious weaknesses in Lightroom’s Slideshow, and assuming nothing new appears in Lightroom 4’s final release, it might be interesting to speculate on what may come down the track before too long, and to ask what people think. So in descending order of priority, for me these improvements would move the workspace from “good enough” to “best of breed”:

  1. A timeline
  2. Multiple audio tracks
  3. Transitions like Ken Burns
  4. Add video clips to slideshows
  5. One feature that would fit slideshow’s presentational role is speaker’s notes just like Powerpoint. So you would run the show and see your reminders or scripted comments on your own screen. Low hanging fruit in software terms, but very rewarding for the user whose presentation appears so much more polished.

I find people apply the term “slideshow” to three different activities – a web gallery, a Powerpoint-style public presentation, and a standalone show with separate sections, such as wedding DVDs, for example. Lightroom’s Web and Slideshow cover the first two, but not the third.

So to broaden my original enquiry, to what extent do people think Slideshow should be extended into authoring standalone shows? Like Proshow, for example, which is so popular with wedding photographers, it would allow you to create a front menu with access to individual slideshows (preparation, ceremony, reception etc) and might export to various formats – DVD, iPad etc. It’s a big extension from the current Powerpoint-style presentation that Slideshow provides, but for certain groups of users it would provide a much more efficient way to accomplish their existing workflow. Should this be a priority for 5?

Search and Replace plug-in – version 1.35 coming

If you use my Search and Replace Lightroom plug-in, I’m currently updating it. So if there’s something you want, now’s a good time to ask.

Dropping Windows XP

Lightroom 4 dropping support for Windows XP has generated a lot of sound and fury from those who are going to need to upgrade their operating system or computers if they want to run the new version.

I don’t think any of us – not even Apple fans – like being forced to upgrade our computer systems any sooner than we want, but this doesn’t strike me as an evil decision by Adobe.

For Adobe it is a simple business decision and of course they look at what LR users are running. XP has been around for how long? And I dare say that it’s only because of Vista’s woes that so many photographers are still holding on to it. Features such as burning DVDs and other optical drives are built into more modern operating systems, and improvements to video handling also reflect developments which XP was never envisaged to handle. The costs of maintaining support for XP simply don’t add up over the lifetime of LR4.

Lightroom isn’t Photoshop, and Photoshop CS6 does support XP for the simple reason that “Photoshop’s user base is much different than Lightroom’s and many more of our customers are still on Windows XP”.  See the explanation here.

And it’s not as if Adobe are not being unfair to PC users, which is something I occasionally fear. Nor is it a case of “I’m all right, Jack” because LR4 won’t work on non 64 bit Macs, just like my Core Duo based Mac Book Pro and I’ve had to fork out for an Air.

No doubt someone reading this will be annoyed at the move, but I thought that this site’s visitor breakdown by OS would be a pretty good approximation to Lightroom users in general. 12% of the 45% using Windows, and how much by the end of the year? Reasonable decision?


Lightroom 4 and facial recognition

On Adobe’s Lightroom 4 Beta forum, one of the most contentious topics has been the omission of automated facial recognition or facial detection feature. If you don’t get the distinction, one is the computer trying to figure out who someone is by comparison with existing pictures, the other is it doing only the first step in that process and finding faces so you can identify them manually.

While I consider it as important as of those two features, I agree with it receiving a lower priority than books and geotagging. Apart from the likely demands on the computer, the trouble is that if face recognition data is ever added, it will need proper provision to keep that information private if the user wishes. So rather like keywords can be marked not to export, data about people needs to be fully controlled – with the default being that it isn’t written to exported files.

I am certainly in favour of recording who is in a photo in a more structured way – using the existing Person Shown field but in a keywords-style panel and with image areas defined. I’m not against face detection or automated recognition in principle, just not if the price is failing to deal with existing weaknesses in Lightroom’s DAM features.

What do you think?

Lightroom 4 Layout Overlay Options

Perhaps like most people I really hate the sound of my own voice, but some things are probably much easier to show than they are to describe in words.

So, Lightroom with a Mancunian accent arrives on YouTube….

Lightroom 4 – My Top 5

On its 6th birthday, Lightroom’s version 4 is here – see the official announcement.

I’ve been using it for a while and actually switched over my main catalogue a few months ago (upgrading a Lightroom 3 catalogue is disabled in the public beta) and given some aspects a pretty good hammering. Others will no doubt list all the new features to exhaustion, so these are my favourites. The new Book feature is top of the list.

Book.

When Lightroom 2 was released back in mid-2008, I wrote Five for Three and listed the top 5 new features I wanted in the next version of Lightroom. Top of that list was being able to create books directly within Lightroom. It may have arrived a cycle later than I had hoped, but it’s here now and I’ve already had the chance to use it for real. It’s Blurb for now, but watch out for others to follow.

Since some of Book’s developers have previously worked on InDesign, there are some terms like kerning and leading that will mystify the uninitiated (like me) and be familiar to others. But for me one of its glories is that there are templates for double paged spreads – no longer do you need to figure out what “gutter” may mean or chop images into two carefully aligned halves.

Overall quality was good and up to the standard I’d expect from Blurb. I tried a few things – black and white (surprise!), colour (eek!), and two page spreads – and the attached PDF shows these details:

– Cover was fine. A small unevenness near the spine?
– Spine text not quite aligned
– Specifically chose no-logo!
– Image positioning correct, and colour about right
– Spreads – take care. Flow across pages not q right – physical limits of the book type?
– The more detailed images came out well. Sharpness good. Those with smooth gradients showed some banding – I noticed, but normal folk wouldn’t. Again that’s outside Adobe’s control.
– Black and white. Neutral in daylight – slight magenta cast in some artificial light. It’s an old problem with colour printing and black and white, but the tone is consistent and subtle.

So the glass was more than half full, and it’s going to be easy to tweak this book for a final version.

Layout Overlay

Lightroom 3 introduced tethered shooting, the ability to connect your camera directly to the computer and shoot directly from Lightroom.

While that’s great for those who do a lot of product and cover shots, a big omission by comparison with Capture One was the ability to see new pictures framed in a mockup of the intended layout. For some studio-based photographers , this was a crucial reason for preferring that program over Lightroom (and its tethering features still remain the best around) while over the last few years so I had encountered more than Lightroom user with home-brewed solutions – usually attaching a sheet of overhead transparency to their monitor.

Now you can create a PNG file in Photoshop or Illustrator etc and shoot new pictures directly into the layout – it’s under View > Layout Overlay. Here I’ve defined a transparent PNG with this site’s logo and framed my composition as I shot directly into Lightroom.

While its main purpose is for tethered workflows, I suspect it may also be useful when you’re doing compositing and want to see your how your subject would look with different backgrounds. You would extract the subject from its original image in Photoshop, save out a PNG and use in Lightroom as your Layout Overlay.

Video – Lightroom 4 Layout Overlay Options

Map

I can’t find where I may have asked for this, but having experienced it first in Microsoft Expression Media and then later in Apple Aperture, I’ve been delighted to see GPS-tagged images can now be displayed on a map within Lightroom and GPS values can be assigned by dragging and dropping.

Notice the Saved Locations. It’s tempting to define lots of these as shortcuts to areas of the map – click the arrow to the right of the number count and Lightroom goes to that spot on the map. Furthermore, it is possible to assign images’ GPS co-ordinates by ticking on the left of the Saved Location.

In general though, I wouldn’t create too many – drop images onto exact locations. Instead try to think of Saved Locations as smart collections for GPS (which begs the question of why they aren’t smart collections). So they show you how many of the filmstrip’s images are within a certain distance of the Saved Location’s centre point. In this example I can see that I have 337 images taken within 300 metres of Blea Tarn.

Softproofing

I’ve never disguised that Lightroom’s lack of softproofing was not something that worried me. I don’t dispute its value when you do know how to do it properly but I observe far fewer photographers use it in Photoshop than some would like to think – if you don’t believe me, try asking other Lightroom experts off-the-record.

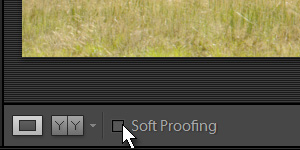
Here’s where you switch on soft proofing

But among a segment of Lightroom’s user base its absence has been a reason for not using Lightroom or for creating awkward workflows via Photoshop.

So it was the last item in my Five for Three article in 2008, though I didn’t mind it failing to make the cut for version 3. But I’m glad to say it’s here now and I’m sure those who already soft proof will be delighted.

Those who want to find it will do so, though I doubt it will cause more people to soft proof. In a way that’s sad, but it’s also because the soft proofing interface doesn’t get in your way, and that’s got to be a good thing for those who never had any interest in soft proofing. Sooner or later, it simply had to come. Now jog on.

Via by Andrew Rodney


The (combined) Exposure Slider

Over the last few years I have noticed how many Lightroom users are uncertain about using the Exposure and Brightness sliders. You wouldn’t think it is too difficult, the first having the power to brighten the entire image, and the second brightening a wide range of midtones but burning out the highlights.

But I feel the problem was one of balance. Exposure tended to be overused, and any highlight problems corrected with the recovery slider, and I can’t remember how many times I’ve looked over someone’s shoulder and asked why they never seem to use Brightness. There’s more to the changes, but combining Exposure and Brightness is a good move – you’re effectively controlling overall image brightness with a single slider.

What others think

See Lightroom 4 beta resources, Sean’s fast-growing list, and the official beta forum.

Lightroom 4 – global flags and local stacking

Flags are now global, not local. Previously you could create a dumb collection, and mark pictures with the Pick flag (P), Reject (X) and unflag them with U. It confused some people when those flags weren’t visible when they looked at the pictures in their original folder or in another collection. The idea was that you might want to flag images in different ways in different circumstances, so if you imagine a wedding you might have the same photos in a For Album collection, also in a For DVD, and use flags to shortlist pictures separately. This “local” nature cut both ways – confusing some, enabling others – and my own attitudes have changed over time from initial dislike to finding it a useful feature. But with LR4, flags are now as global as star ratings and coloured labels, and if you’ve been using them locally you’re simply going to have to change your working practices.

For myself, on balance, I would have preferred flags to stay as they were, but I do mostly use them in a way that won’t be impacted by the change and accept that it will reduce confusion. If you do find the loss of local flags breaks your way of working, then I think you may want to look at the new possibility to stack photos within collections.

Personally, I have never been a big fan of stacking. In general, I feel it’s a great way to forget pictures exist and fail to mark them up with copyright and other metadata. So I’ve restrict my use of stacks to grouping the component original frames of panoramas, HDRs etc, and don’t really like the thought of extending that use any further. But in collections, now flags affect the entire catalogue, the new ability to stack items within collections may be the way to pick and reject images.

Being a bit cynical, it should help sales of my Syncomatic plug-in.

Previously you could only stack images within folders. You can now create stacks in collections too.