LUTs to Lightroom
I tend to use LUT-based profiles mainly for special effects
A few months ago Adobe added the ability to integrate colour lookup tables or “LUTs” into Camera Raw profiles, from where they can be used in Lightroom.
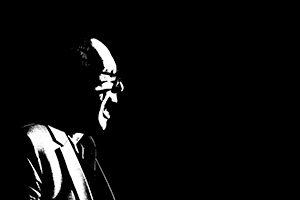
What this means is that you can now quickly produce looks and styling that previously required you to spend a bit of time working in Photoshop – even special effects as shown here, for instance. While I don’t often do this kind of thing, it’s nice to have – and it works well for much subtler effects.
Making these LUT-based profiles is documented in the Profiles SDK. It iswell-written but is a little obscure, and the method involves using the Camera Raw dialog box and is somewhat fiddly. So I don’t think Adobe intend humans to use it – but it is perfectly possible.
This is a quick recording that takes you through
- creating a simple LUT from Photoshop adjustment layers
- creating a new LUT-based profile in Adobe Camera Raw – an xmp file
- adding it to a group
- giving it flexible options so you can apply it to any image
- seeing it in Lightroom
- applying it to a whole shoot
It’s only a quickie, so there are minor jumps where I’ve edited out little bits of me “faffing around”, and I’ve not gone over the text annotations – so forgive any typos. It’s best watched full screen – and it’s meant to be silent!
Download the LRT-based profile
If you want the LUT-based profile I created in the video, here it is:
- the B&W posterize profile
- an Invert profile for converting negatives to positives
To get it into Lightroom and other Camera Raw environments, unzip the file to somewhere like the desktop, then use Lightroom’s Profile Browser where there’s an import command. It should be shown in the listing, and you can then delete the copy on the desktop.
