20 minute wow (as Orwell might have put it)
Someone, somewhere asked a good question about Lightroom. How would you wow a mixed group of existing users and other photographers when you’re allowed just 20 minutes? 20 minutes? At most? Without anyone asking you something? And let’s say we’re not dealing with thickos, but potential “power users”, or those who think they already are so. Well, and I bet someone* rips this off, it’s got to be bullet points :
- First I run through Library
- Remind people the raison d’etre of this kind of program is to manage large numbers of pictures, not just post processing
- But metadata and organisation quickly send most people to sleep, so
- Straight down the left panel. Folders show you always know where your pictures are (any Aperture users watching?)
- Slide briefly across the bottom filmstrip (F6, drop down list of recent sources)
- Up the right panel in a couple of parkour leaps. Keywording is there, templates too.
- That’s all they want to know, for now. Move on.
- Straight to Develop and straight to switching on Auto Sync mode
- Drag a few sliders from Basic panel and (double click filmstrip’s top line) watch ’em all change
- Hold down the Alt/Opt key and blow those highlights
- Double click a slider label to reset it, then Shift double click it
- Stress again that Lightroom’s raison d’etre is handling pictures, plural, while Photoshop is for the singular.
- Auto Sync is also the fastest way to work, and much faster than using Sync or (any Aperture users?) Aperture’s Sync-equivalent “lift and stamp”
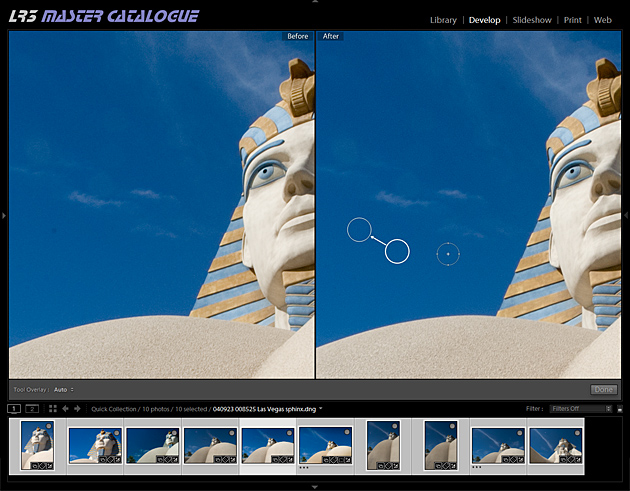
- Dust spotting while in Auto Sync mode is next
- 20 or 30 small aperture shots with nice blue skies
- But – careless me – one picture shouldn’t have been selected and the spot correction goes wrong.
- You’ve got to keep your head screwed on with Auto Sync (if you can’t, don’t use it)
- Work in Auto Sync all the time, or never – don’t keep switching.

Multiple items selected in Auto Sync mode - all images corrected with one click
- Targeted adjustment tool
- Lightroom’s subdued UI means many existing users forget it’s there
- Show how your eyes stay on the image and how it is changing as you work. You’re not even looking at the sliders (hide the right panel)
- We’re now talking quality, with an L (a cue to cycle through Lights Out)
- V and into black and white, quick drag (on image area, not dress style)
- Hit Y to show Before / After split screen
- Stress the fine tuning
- Shift Y, Z, Z, Shift Y
- Drag steps from History or Snapshots into the Before area
- Local adjustment brush
- You don’t need to do that in Photoshop any more
- Auto Mask
- O – and remember to say keyboard shortcuts are shown in Help – shift O – O again
- Develop Presets
- I bet that surprises some folk reading this!
- Mine include one per profile (from the Calibration panel)
- Slideshow, Web, Print
- Three words, three clicks
- Show Print’s templates, contact sheets
In 20 minutes that’s about as much as I can pack in. And if that doesn’t leave their heads spinning….
Also see: update / rationale.
* no-one specifically in mind