
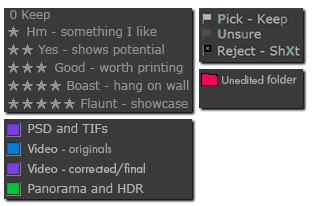
The panel end marker I used in my own catalogue
The idea behind Lightroom’s star ratings is that they are for longer-term evaluation of a picture’s quality, while for more-immediate decisions we have flags that identify our intention to keep or delete. Meanwhile labels are for whatever makes sense to you.
Star ratings should not be set in stone. After a while you may identify some new quality in a picture, and with greater experience you might become more critical of your earlier photography.
At the same time, I’ve always felt that it’s a good idea to aim for some consistency by defining for oneself what the stars actually signify. That meaning is, of course, highly subjective. One photographer might define 5 stars as being fit to hang on her gallery walls, a stock photographer might ignore artistic merit and only consider saleability of his images, while a picture of a lost relative may have enormous sentimental worth that outweighs any aesthetic value.
Despite the role of subjectivity, it’s still worth some effort to mitigate inconsistency. You don’t want to give acceptable pictures a 1 star rating but then a couple of months later apply 0 stars to equally-mundane pictures because you happened to be in a bad mood. Whatever your own definition may be, consider writing it down – something as simple as a post-it note on the screen’s side may help.
Alternatively, with a tiny bit of imagination you can exploit an often-forgotten detail of Lightroom’s interface – the “panel end marks”. These decorations at the bottom of Lightroom’s panels have often been derided as a waste of programming time, but in fact they can be made to serve more than their somewhat-trivial purpose. And as you can see in the examples on this page, they can serve as a reminder of star ratings, colour labels and even keyboard shortcuts for flags.
Its 2021 version
These Panel End Marks are simply png files stored in the Panel End Marks settings folder and you can easily create your own in Photoshop. I save mine using Photoshop’s File > Export > Save for Web (Legacy) and I use its PNG-24 preset as this keeps any transparency. You then put the files in the Panel End Marks folder.
- Windows
- Go to the bottom of the left or right panel in Library
- Right click and select Panel End Marks > Go to the Panel End Marks folder
- Save the png files in that folder and close Explorer
- Right click the panel end mark and choose the image you want to use.
- Mac – obsolete as this is no longer possible
Go into Preferences, Presets, and click the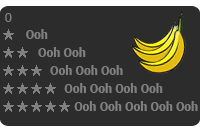
One for April Fool’s DayShow All Other Lightroom Presets buttonIf one doesn’t exist, create a Panel End Marks folderSave the png files in that folder and close FinderIn Lightroom’s Preferences, Interface, choose the marker